You finished caulking the tub and now you’re wondering when it’s safe to turn on the shower. For most 100% silicone caulk, the answer is 24 hours.
“Surface dry” and “fully cured” aren’t the same thing. A bead can feel firm to the touch in 30 minutes, but the inside stays soft and vulnerable to water for much longer.
Humidity is the biggest factor. A steamy bathroom can finish curing a bead in under a day, while a dry winter garage at 55 degrees may push the wait past 48 hours.
Bead thickness matters too.
This guide covers the common caulk types at the hardware store, what speeds or slows curing, and a simple fingernail test to check if your bead is actually ready. Our piece on silicone waterproofing explains why the material seals so well once it’s fully set.
Below, we start with the different kinds of caulk and how their cure times compare.
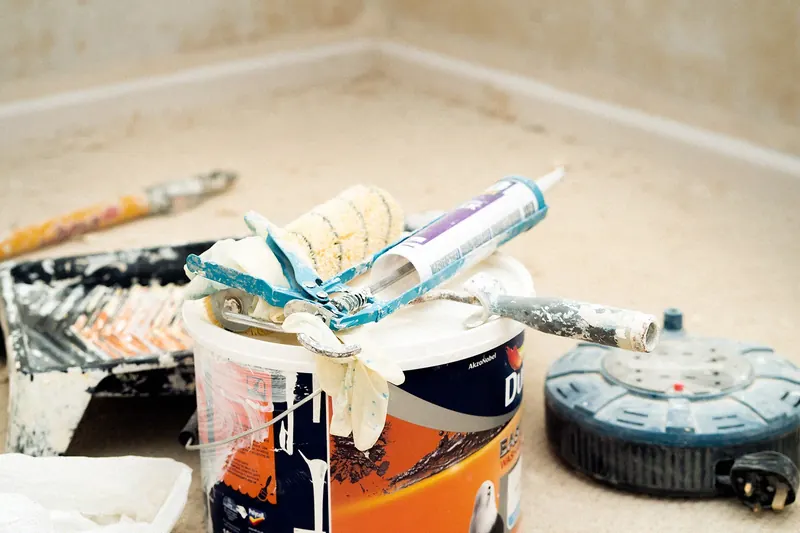
Kinds Of Caulk
Not all caulk is silicone, and the differences matter because drying times vary wildly from one type to the next. Here is a quick breakdown of the common ones you will see at a hardware store and how long each one actually takes to cure.
Silicone Caulk
This works best with glass, metal, and plastic because it clings effortlessly to smooth, nonporous surfaces, to give a dependable bond.
Silicone caulks with antimicrobial added substances are currently accessible.
They are extraordinary as they help keep germs under control in washrooms and kitchens.
Acrylic Latex Caulk
This is best for filling little holes and joints in wood, especially in regions that will be painted and not presented to much water.
This is because acrylic latex caulks can break after some time, leaving surfaces open to water harm.
Some acrylic latex caulks presently have silicone added substances to improve adaptability, sturdiness, and waterproofness. Making it proper for tub and sink use.
Polyurethane-based Caulk
This caulk is particularly for outside use and window seals.
Polyurethane is also paintable, more flexible, repulses soil, and makes a watertight seal, however, it takes more time to fix than silicone or latex caulks.
Acetic Sealant
This is not advisable for use in concrete and metal items.
This material is a bit corrosive and can erode the metal.
It’s mainly used when working with plastic, wood, and pottery.
Neutral Sealant (or widespread)
It has on the bundle marking as the Latin letter N.
It’s also relevant for a wide range of materials, the neutral sealant is impervious to water.
It also fits nicely on metal and can be utilized for aquariums hence the alternative name, “widespread”.
Sanitary Sealant
Just as the name suggests, it’s a sealant used in the washroom, another name for it’s a bath sealant or shower sealant.
It’s specially designed for use in a wet environment because of its water, mildew, and mold-resistance properties.
The waterproof sterile sealant isn’t affected by hot or cold water, it’s also impervious to temperature boundaries and UV light.
How to Make Use of Silicone Caulk
Silicone caulk goes through two stages after it leaves the tube, and understanding the difference is what saves DIY projects from failing. The first stage is surface skin: the outside of the bead firms up enough that you can walk past it without smearing it.
That usually happens inside the first hour. The second stage is the full cure, where the inside of the bead cross-links from the outside in until the whole thing is solid rubber.
That stage runs in the background for the next 12 to 24 hours and is what you are actually waiting for before you run water over the joint.
There are “quick drying” products on the market that claim surface dry in 10 minutes and a full cure in three hours. In practice, most of those still need the full 24 hours under less-than-ideal humidity, and the fine print on the tube usually admits it.
Unless the project is critical, the safest move is to assume 24 hours for any silicone caulk regardless of the marketing on the label. You can read more on caulk drying time if you want the brand-by-brand breakdown.
Components Affecting Drying Times
Humidity is the biggest lever. Silicone literally uses water vapor from the air to finish its chemical reaction, so a steamy bathroom cures a bead faster than a dry winter garage at the same temperature.
If your workspace is dry, the 24 hour rule can easily become 36 or 48 hours.
Temperature matters too, but not in the way most people assume. Warmer air holds more moisture, which helps silicone cure faster, but directly heating the bead with a hair dryer actually works against you.
The surface skins over too fast and traps uncured silicone underneath.
The third factor is bead thickness. A pencil-thick line of caulk in a shower corner cures meaningfully slower than a thin smear around a tile edge, simply because there is more material that needs moisture to reach the middle.
Use Caution With Drying Times
Purported quick-drying silicone caulk items can require as long as 12 hours before being completely restored, and most will need at any rate 24.
Silicone sealants will be dry to the touch within thirty to sixty minutes, yet, this doesn’t imply that the seal is ready!
Before being presented to damp conditions, silicone must fix.
As a rule, most silicone sealants take around 24 hours to fix totally.
They can be securely presented to water, dampness, and different states of use after this point.
It’s essential to refer to, nonetheless, that a couple of elements can affect relieving time.
The most significant of these are:
Type of Silicone
Specific silicones, for example, sealants intended to withstand high temperatures, for the most part, have a more complex synthetic structure. This prompts a marginally longer fixing time.
The purity of Silicone
A few silicones (particularly those intended for indoor use) are blended in with substances, for example, acrylic or elastomeric mixes. This can likewise cause a slight increase in relieving time.
Humidity
Even though it might appear to be somewhat strange, a moist atmosphere encourages quicker restoring.
Temperature
The hotter the temperature, the quicker your silicone will fix.
It’s however suggested that you abstain from applying direct warmth to silicone with an end goal to accelerate the relieving cycle.
This isn’t viable and can adversely affect the lifespan of your silicone.
Avoid Any Risks, Even With “Quick-Drying” Recipes
So how long for silicone caulk to dry using the “quick-drying” techniques?
Some silicone caulks are publicized as “quick-drying,” guaranteeing a one-hour dry time. However, read the fine print before going with this information.
It might be that the ideal drying conditions for this rate are a thin scope of temperatures and moistness levels.
Plan at any rate three to 12 hours for these items to dry and an entire 24 hours to fix.
For latex-based items, 24 hours is likewise suggested before water introduction.
Polyurethane caulks can take as long as ten days to heal completely.
Consider If The Caulk Can Be Painted On
In cases that you mean to cover up caulk, you’ll discover caulk that is fit to keep relieving underneath a layer of paint.
With this item, you can commonly apply paint following 30 minutes, while with polyurethane caulk, you would have to stand by for seven to ten days until the surface is restored before painting.
Whatever recipe you pick, make sure to go through the directions properly, as every producer has various equations with ideal strategies for application and drying.
An acrylic latex-based caulk dries as water dissipates from the material, so putting a fan in the room will accelerate the cycle.
Alternatively, silicone caulks need dampness to dry and fix. A humidifier in the room is a great resource.
Polyurethane caulk ought not to be presented to water or added moisture immediately for at least three to seven days.
The Temperature Will Affect The Caulk’s Drying Time
The ideal temperature for applying and relieving caulk ranges between 40 and 80 degrees Fahrenheit, so change your indoor regulator appropriately.
In the case of caulking in winter where the air is regularly drier, it might take silicone longer to fix. Yet don’t attempt to speed the cycle by adding heat (e.g.
with a hairdryer), as warmth mollifies and can conceivably soften silicone.
Latex will freeze in the tremendous cold and bone-chilling air needs enough dampness for appropriate polyurethane relieving, so abstain from utilizing it in frigid temperatures.
Utilize New Caulk For The Best Outcomes
More seasoned silicone and latex caulk can decrease in quality, even inside a fixed tube and never wholly fixed.
Most manufacturers will put a lapse date on the caulk tube, yet if you have a container of undated caulk lying around, you can avoid any risks and purchase another one or test a strip on a strong surface first.
If the caulk is new, you should see a firm “skin” start to frame inside 30 minutes.
Polyurethane caulk ought to be utilized within a year of production date.
What makes this natural material so great at what it does?
The rubbery substance is accessible in an assortment of definitions including silicone and latex, and air conditioning.
It proves effective in fixing spills around entryways and windows, reduces home energy expenses, and also improves your home energy effectiveness.
As indicated by the Consumer Federation of America, it also reduces your carbon impression.
For this work, you can pick acrylic latex.
Acrylic latex works best in dry conditions and will perform well for as long as 15 years, while vinyl latex can be utilized in soggy regions and keeps going around five years.
Cement and mortar fix caulk is an incredible apparatus for fixing breaks and holes in concrete, block, plaster, stone, and metal.
Likewise, it’s ideal for improving little crevices in establishments and storm cellar dividers that permit creepy crawlies, rodents, and different irritations to enter your home.
Intended for both inside and outside use, cement and mortar fix caulk has a finished completion and can be painted once dry.
Regardless of how cautiously you measure and cut, you regularly end up with little holes among, above, and underneath moldings and baseboards.
When you have to close the gap, acrylic latex caulk is ideal for occupying those small spaces.
The item dries rapidly and can be painted six to eight hours after application.
Acrylic latex additionally arrives in a wide range of shades so that you can coordinate the shading to the encompassing material.
Never unfashionable in kitchens and washrooms, tile has suffered as the decades progressed.
Over the long haul, in any case, little spaces can open up among tiles, and in saturated conditions, that is a sign for the buildup to assemble behind the dividers.
There are a few sorts of caulk that can be utilized in such circumstances.
Ideal for wet conditions, 100% silicone caulk and siliconized acrylic caulk structure is a solid and watertight seal.
Shape and mold-safe silicone caulk is made for nonporous surfaces like earthenware, glass, and metal, while waterproof siliconized acrylic caulk functions admirably on tubs, tile, drink, and artistic tile surfaces.
This Gorilla Glue sealant is ideal to use since it’s 100% silicone, waterproof, and form and mold-safe.
When you have to cover little openings and small breaks before painting, the painter’s caulk, an acrylic latex compound, is precisely what you need.
Painter’s caulk (accessible at The Home Depot) clings to wood, drywall, brickwork, and different surfaces.
Because it dries to a paintable surface in about 60 minutes, it’s a decent decision for occupied DIYers.
A specific sort of caulk. Flame-resistant caulk.
Does more than fix openings.
It helps make your home more secure by keeping the fire from traveling through open spaces inside a structure.
Flame-resistant caulk (accessible from The Home Depot) can be utilized in sealing openings, holes, and breaks around doors inside, particularly around plumbing or electrical channels.
When a length of trim tumbles off, an edge of floor covering comes up, or a tile comes free, it’s old-fashioned generally good caulk that can fix it.
You can even utilize universally handy caulk to introduce wood framing without nails!
With sealants, you can fill the holes in windows and entryways.
It’s also utilized when laying electrical wires and links.
A sealant is utilized in the machine apparatus industry and the designing business - it’s fundamental for amassing segments from plastic and metal parts.
Based on use, all sealants are separated into one-and two-segment.
The first is used legitimately. Their steady-state is shaped under ordinary conditions affected by dampness and air.
To solidify two-segment types, an extra substance is needed that assumes the part of a stimulus or force.
It’s accepted that the acidic sealant takes a normal of 5 hours after application to the surface.
His nonpartisan “sibling” needs considerably more time - the entire day.
Simultaneously, the encompassing temperature ought not to fall beneath +5 degrees.
In the two cases, it’s perceived that the sealant is applied in a solitary layer of medium thickness.
For each kind of glue, the drying time is shown on the tubing.
The creation dries out bit by bit.
Refer How long Caulk takes to Dry
How To Tell If The Caulk Is Actually Cured
The simplest test is the fingernail check. Press lightly into the bead with a fingernail at the 24 hour mark.
A fully cured bead rebounds cleanly and does not dent, pick up on your nail, or leave a mark. If it feels tacky, soft, or squishy in the middle, give it another 12 hours and try again.
The second test is your nose. Most silicone caulk smells faintly like vinegar while it cures, because acetic acid is the byproduct of the cross-linking reaction.
Once the smell is completely gone from the joint, the bead is cured. If you are still catching a vinegar whiff the next morning, the caulk needs more time.
Skip the hair dryer tricks, the fan tricks, and the “does it feel dry yet” tricks. For a clean finish on the bead itself, smoothing silicone caulk with rubbing alcohol is the technique most pros rely on.
Silicone does not cure faster from direct heat, and forcing a surface skin just traps wet caulk underneath that can take days to finish setting.
Silicone caulk doesn’t dry - it’s fixed.
That implies a relieving operator in the silicone must be dynamic and working when it’s applied.
Various brands, evaluations, nature of caulk, and multiple factors such as moistness, area, application, warmth, and introduction to light, would all influence the rate at which silicone caulks will fix.
Not all silicone caulks are made equivalent. Some dry quicker while others are slower.
Based on the recipe and the kind of silicone used, you may need just a short time before you can use the tub, sink, or another thing you have caulked.
There is likewise a quick-drying caulk you can use that will, in any case, have a long fix time yet will require a more limited stand-by before use.
Ensure you have a good, 100% silicone caulk and not a mix of silicone and acrylic or elastomeric latex sealants, for example, DAP Dynaflex and Polyseamseal.
Elastomeric sealants aren’t real silicone caulks, even though they are often confused as such.
Silicone caulks have a lapse date and if the caulk is already outdated, it might never fix. The material itself is not flammable, but expired caulk should still be discarded properly.
If all else fails, test a piece on a nonporous surface to check whether the caulk gets rubbery and flexible following 24 hours.
Most silicone will dry to the touch within 30 minutes to 60 minutes. This doesn’t mean the silicone has set.
However, if this much doesn’t happen as indicated by directions, this is a sign for you to know that something may be wrong.
Anticipate a normal of 24 hours for most silicone to fix, so if it has not been restored by, at that point, you ought to think about purchasing another container of caulk for your task.
Frequently Asked Questions
Can I shower before silicone caulk is fully cured?
Wait at least 24 hours before exposing fresh silicone caulk to shower water, even if the surface feels dry to the touch within an hour. Running water over a bead that is only half-cured can wash the uncured silicone out of the joint and leave gaps that let moisture seep behind the tile.
Does humidity speed up or slow down silicone caulk drying?
Humidity actually speeds up silicone caulk curing because most silicone formulas rely on moisture in the air to trigger the chemical cross-linking that hardens the bead. Dry winter air or air-conditioned rooms can extend cure time to 48 hours or longer.
Can I use a fan to dry silicone caulk faster?
A fan helps move air across the caulk bead, which can slightly speed surface drying, but it will not meaningfully accelerate the full cure because silicone cures from the outside in through moisture exposure. Do not use a hair dryer or heat gun to force drying, which can skin over the surface while leaving the inside of the bead uncured for days.
How do I know if silicone caulk is fully cured?
Press the bead lightly with a fingernail at the 24-hour mark. Fully cured silicone rebounds firmly and leaves no mark, while uncured silicone feels tacky and may dent or pick up on your fingertip.
If it still dents, give it another 12 to 24 hours and check again before running water.
Why does my silicone caulk still smell like vinegar after a day?
That sour smell is acetic acid, which is released as the silicone cures through its chemical reaction with moisture in the air. If you still smell vinegar after 24 hours, your caulk is not fully cured yet, usually because the room is too dry or too cool.
Improve airflow and bump up humidity to speed things along.
Final Thoughts
If you get fresh caulk on your skin during the job, getting silicone off your hands is much easier while it is still wet.
For practical DIY planning, count on 24 hours from the moment you finish the bead to when the caulk is safe for water. That single number covers most indoor projects, most brands, and most conditions cleanly.
Humidity and temperature shift the timeline more than people realize. A bathroom with steamy shower air cures noticeably faster than a dry winter garage at 55 degrees, since silicone needs atmospheric moisture to finish its chemical reaction.
Skip the fan tricks and hair dryer shortcuts because silicone cures from the outside in. The only reliable test is a fingernail press at the 24-hour mark, and if the bead rebounds cleanly without marking, you are good.
Plan the caulking into your project schedule instead of treating it like a last-minute task. Re-caulking a shower on Friday night and using it Saturday morning is the most common DIY failure pattern, which is exactly why “my caulk failed” threads exist online.