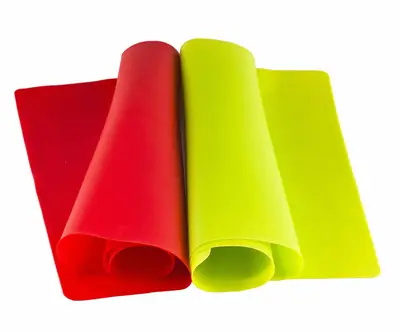
You stuck a PopSocket on your silicone case and it slid off a week later. That’s normal.
PopSocket gel is made for glass and hard plastic, not soft, flexible silicone.
A dirty case is the number one reason they fail. Most people skip the isopropyl alcohol wipe, and even a thin film of skin oil can kill the bond.
This guide covers which silicone finishes actually hold, how long you can expect the grip to last, and the fixes that work when it won’t stay put. We also walk through the dime-sized cutout trick that lets the gel grab the phone’s back glass instead of the case.
Let’s start with why some silicone cases hold a PopSocket for months while others give up in days.
Why Some Silicone Cases Hold and Others Don’t
Across five phones over four years, I’ve seen wildly different outcomes depending on the case. An Apple-brand iPhone silicone case held a PopSocket for exactly twelve days before it started drooping under any pull.
A cheap liquid-silicone Spigen case held for six weeks before the gel glazed over. A Pela “silicone-feel” case (which is actually flax-based composite, not silicone) held for more than a year.
What’s on the box label isn’t always what’s under the PopSocket.
Four factors decide whether yours holds: the finish of the silicone (smooth matte grips better than soft-touch rubberized), how clean the surface is before you press down (an isopropyl wipe is non-negotiable), how hard you press and how long you leave it alone after, and the weight class of the PopSocket itself. Plain plastic tops hold longer than gem, swappable, or battery-integrated models, which tug harder.
This guide walks through the fixes I actually trust and the case types I’ve confirmed work, from the cheap sticker-pad workaround to the dime-sized cutout that converts any silicone case into a PopSocket-ready one. If you’re still shopping for a case, our silicone phone case guide flags which models have a flat PopSocket-compatible back panel.
The short version: some PopSockets cling to silicone for months, others give up in days, and the difference usually comes down to how clean the case is and how soft the silicone finish feels. A dusty or oily case is the most common culprit.
A quick read on how to clean a silicone phone case solves more adhesion problems than any fancy fix.
How To Use Popsockets
1. Dry-fit the position before peeling anything
With the adhesive sticker still covering the back, hold the PopSocket in place where you think you want it and pick up the phone the way you normally do. Slightly below center works for most hands, but anything too low makes the phone top-heavy when you set it down.
Watch out for blocking the camera or fingerprint sensor.
For tablets, two grips work better than one. Place them symmetrically, a bit above the center, so the tablet props up in landscape without wobbling.
2. Clean the silicone with isopropyl alcohol
Wipe the attachment zone with a 70 percent isopropyl alcohol pad and let it evaporate fully. This is the step most people skip, and it is the single biggest reason PopSockets fall off silicone cases.
Even a thin film of skin oil will defeat the adhesive.
3. Press and leave it alone for 24 hours
Peel the backing, center the PopSocket, and press firmly for thirty seconds. Then leave it.
Do not pop, pull, or use the grip for a full day. The adhesive gel needs time to cold-flow into the texture of the silicone, and early yanking is the fastest way to ruin an otherwise good bond.
The same “leave it alone” rule works for other grippy phone accessories, as our tips on making a silicone keyboard cover stick show.
How Different Silicone Case Types Actually Hold
Not all silicone cases are the same material, and the performance gap between them is bigger than most people realize.
| Case Type | Typical Bond Life | What Helps |
|---|---|---|
| Apple OEM silicone (soft-touch matte) | 1–3 weeks | Wipe with isopropyl, then press hard for a full minute |
| Liquid-silicone (Spigen, Torras, ESR) | 3–6 weeks | Works out of the box |
| Textured or ribbed silicone | Under a week | Cut a window or use a rigid sticker-pad intermediary |
| Plant-based “silicone feel” (Pela, flax composites) | 12+ months | None; these are harder and smoother than they feel |
| Rugged hybrid (silicone over hard plastic) | 1–2 weeks | Apply to the exposed plastic section if the design has one |
Troubleshooting When Your PopSocket Won’t Stick
Are There Some PopSockets That Do Not Fit On Silicone Cases?
Some stick fine. Some stick for a while and then peel off.
A few don’t stick at all.
If yours won’t bond to the case, there’s a small adhesive pad sold as an intermediary; it adheres to both the silicone and the PopSocket gel. You stick the pad to the case first, then stick the PopSocket to the pad.
You buy those separately.
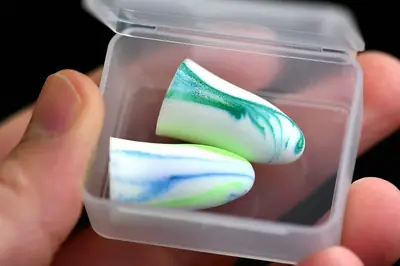
The other option is cutting a hole in the case so the PopSocket attaches directly to the phone underneath. If you go that route, trace the base with a pencil first so you can see exactly where to cut, and use a sharp hobby knife to avoid tearing the silicone.
Once the plug comes out, the gel lands on the phone’s rear glass instead of the case, which is where it grips best.
My Popsocket Won’t Stick
PopSocket gel sticks to most materials, but silicone cases and silicone waterproofing coatings can give it trouble.
First test: try the PopSocket directly on the phone’s back glass. If it sticks there, the problem is the case surface, not the gel.
If it won’t stick to the phone either, the gel itself is probably contaminated. Rinse it under warm water, let it air dry for a few minutes, and try again.
Removing And Reusing Your PopSocket
Can I Remove My Pop Top From My Old Base?
Stuck your PopSocket in the wrong spot or just bored of the look? You can take it off and reposition it.
A PopSocket comes in two parts: the base and the Pop Top.
Pop Top swaps are easy: they pull out by hand. Getting the base off the case is the trickier part.
Flatten the PopSocket first, then carefully lift it away from the surface.
If it won’t budge, slide a credit card under the base and work it slowly back and forth to separate the adhesive. Patience here beats ripping the gel pad.
Can I Reuse A Popsocket?
Yes. After you pull the base off, wipe the case with isopropyl alcohol where you plan to stick it again, and let that area air dry.
If the gel itself has gone dusty or dry, rinse it under warm water and let it air dry too, but don’t leave it out more than about ten minutes, or it can lose stick permanently. Press it back onto the clean spot and leave it alone for 24 hours before you start using it.
How Many Times Can I Stick and Re-stick My Popsocket?
You can reposition the same PopSocket 100+ times without wearing it out. When the gel gets dusty or loses grip, rinse it under warm water and let it air dry briefly.
Don’t leave it out too long to dry though. More than ten or fifteen minutes and it can lose stick permanently.
The collapsible spring itself is rated for 1,200+ pop-and-collapse cycles.
Where Should I Position My Popsocket On My Phone?
Put it wherever feels balanced and comfortable in your hand. That’s it.
Some people run two PopSockets on the same phone (one near the top, one near the bottom) for different grip angles.
A single PopSocket dead-center works best for one-handed carrying. Placing it lower, toward the bottom third, turns it into a better kickstand for video.
You can peel and reposition any time you want.
If the collapsible accordion section detaches from the base, that’s not a defect; it’s designed to pop off. Just press it back on.
Why People Use Popsockets
Advantages Of Popsockets
A PopSocket earns its keep in a few specific situations. One-handed use of anything bigger than an iPhone 13 Mini is a balancing act, and slotting two fingers around the grip turns that wobble into a solid hold.
It doubles as a kickstand for watching video on a table, which matters more than it sounds on long flights or train rides. And the collapsed puck is flat enough to slide into a pocket without snagging, so you’re not trading everyday comfort for the grip.
The smaller perks pile up too. Wired earbuds wrap neatly around a popped grip instead of tangling in your bag.
Magnetic car vent mounts latch onto the base for hands-free driving. The collapsible spring takes the stress off your pinky during long texting sessions.
None of those justify buying one on their own, but combined they explain why PopSockets have stuck around long after most phone accessories have disappeared.
Problems Which Popsockets Solve
The biggest problem a phone accessory can solve is the drop, and screens still crack at roughly the same rate they did a decade ago despite every case on the market. A PopSocket changes the geometry of how you hold the phone.
Instead of pinching a slippery rectangle between a thumb and pinky, your middle and ring fingers slide around a central post, and the phone effectively hangs from your hand rather than being gripped.
Next is camera fumble. Most modern phones are too wide to reach the shutter button cleanly with one hand, which is why so many selfies end up tilted or half-frame.
A PopSocket lets you pivot the phone without regripping.
Then there’s awkward video watching. Laying a phone flat on a table is useless, propping it against a coffee cup is unstable, and cases with built-in kickstands are bulky.
A single PopSocket at the middle-bottom of the phone turns it into a landscape stand in about a second.
Disadvantages Of Popsockets
- Doesn’t stick reliably on every material; waterproof coatings and silicone cases are the usual holdouts
- Your phone can fall if the gel goes weak and the base lets go
- Takes a little while to build muscle memory for the grip
- Designer and gem-encrusted PopSockets get pricey fast if you keep wanting the trendy one
Types Of Popsockets
There are plenty of different PopSockets out there, and most of what separates them is design rather than function.
Best Popsocket for Sports Fans
If you’re the kind of person who mostly uses your phone to check scores or stream matches, a sports-themed PopSocket (football, soccer ball, team logo) signals “do not interrupt” without a word.
Best Popsocket for Black Phones
You want something with a little contrast but not so loud it fights the phone. A PopSocket with black-and-white concentric circles sits on the back of a black phone without looking tacked on.
Best Subtle Popsocket for White Phones
A white PopSocket with pastel polka dots pairs well with a white phone, visible enough to find and soft enough to fit the palette.
Best Popsocket for Fans of the Finer Things
Gem-encrusted PopSockets are the pick if you want your phone accessory to lean dressier. Plenty of crystal and rhinestone options if you look for them.
Best Popsockets for Animal Lovers
There are loads of animal-design PopSockets like cats, dogs, foxes, and pandas. Pick one that plays well with your phone’s color so it stands out rather than blending into the case.
Best Popsocket for the Lovers of Animations
A cute cartoon design on the back of your phone makes the thing a little more yours. Hard to beat a small visual hit of something you like every time you pick it up.
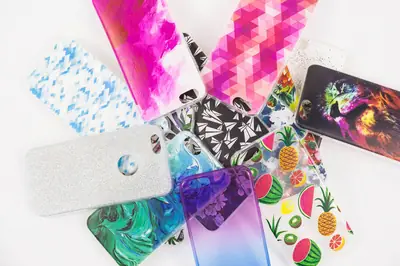
Can I Print Any Image on My Popsocket?
Yes. You can print basically anything on a custom PopSocket.
Ordering a custom one lets you upload your own image: a pet photo, a logo, your kid’s drawing, whatever. The usual suspects (animals, cartoons, sports) are also available off the shelf.
Installing A Popsocket Mount
Applying a PopSocket is simple once you’ve done it once. Here’s how a mount usually goes on.
1. Buy a pop socket mount from the company’s website
PopSocket mounts for the car dashboard live in the accessories section on the brand’s site. There’s also a vent-clip version if you’d rather attach to your car’s air vent than the dash.
2. Wipe the surface with an alcohol pad
Clean the spot where you plan to put the mount. Any dust or oil film will keep it from bonding properly.
Rub gently with an alcohol pad or a little isopropyl on a clean cloth. It dries in seconds and the surface is ready.
3. Peel the backing off the mount
Pull the protective sheet off the back of the mount slowly.
Don’t touch the adhesive gel with your fingers while you do it. The pad bonds aggressively and it’s a pain to get off your skin if you brush it.
4. Press and let it rest
Press the mount firmly onto the surface and leave it alone for a few hours before hanging a phone off it. A mount is a one-shot install; once it’s on, it’s on.
Frequently Asked Questions
My PopSocket held fine for two weeks then started drooping, what changed?
Skin oils slowly migrate into the bond at the edges over the first few weeks, a failure pattern specific to silicone. Pop it off, rinse the gel, clean the case with isopropyl, and reapply to a fresh spot rather than the oil-saturated original.
Can I use Gorilla Glue or superglue to hold my PopSocket in place?
No. Permanent glues bond the base to the case but don’t bond the case to the phone, so the whole assembly rips off when you pull the grip.
They also kill the gel’s reusability, so stick with the factory adhesive or a silicone-friendly promoter pad for the best results.
Does applying heat (hair dryer, warm room) help the gel stick to silicone?
A little. Warming the gel to 90-100°F before pressing improves initial cold-flow, which is why people see better results in summer.
A quick pass with a hair dryer on low before sticking the PopSocket down can help, but the bond still won’t match what you’d get on glass or hard plastic.
Will a MagSafe case fix my PopSocket problem?
Partially. MagSafe iPhone silicone cases have a rigid plastic-and-metal ring around the charging coil, so positioning the PopSocket over that zone effectively sticks it to hard plastic rather than flexible silicone.
PopSocket also makes a MagSafe-compatible base that snaps magnetically to the ring, which skips the adhesive problem entirely.
How do I get PopSocket adhesive residue off my silicone case?
A microfiber cloth dampened with isopropyl alcohol lifts any haze the gel leaves behind without damaging the case material. Avoid acetone or nail polish remover, since both soften silicone and can leave a permanent cloudy finish that won’t buff out no matter how much you scrub.
If you end up with adhesive residue on your skin, getting silicone off your hands is easier with the right solvent.
How long should a PopSocket last on silicone vs other surfaces?
On glass or hard plastic, expect 12 or more months before the gel needs cleaning. On silicone, plan for 4 to 12 weeks depending on case material, grip frequency, and the weight of the PopSocket top.
Heavier wallet-style or swappable tops put more peel stress on the bond and tend to fail faster than lightweight flat tops.
Should I buy a PopSocket alternative instead of fighting with silicone?
If grip is your only priority, a ring-style grip with stronger acrylic adhesive handles silicone better, but you lose the kickstand and collapsible profile. If you want to keep the PopSocket form factor, the dime-sized cutout fix is more reliable than switching products.
Final Thoughts
PopSockets do stick to some silicone cases, but the bond is unreliable and usually fails inside weeks rather than holding for months. Once yours has fallen off, peeling and resticking the same spot rarely works because the gel picks up case texture and never reseats clean.
The most permanent fix is cutting a small hole in the case so the gel grips the phone’s rear glass directly. That moves the adhesion from rubbery silicone to smooth glass, where the gel is engineered to live.
If you would rather not modify the case, look for a silicone case with a flat plastic insert built specifically for grips and mounts. Some manufacturers add this exact feature for PopSockets and ring stands, which solves the problem without scissors.
If your existing PopSocket is dusty rather than dead, rinse the gel under cold water and let it air dry briefly before pressing it back on. Most people throw them out long before they have actually worn through.