Pre-made silicone beads for a single teething necklace can run $30 or more. Pouring your own at home with a two-part kit like Ecoflex 00-30 drops that cost to pennies per bead.
The part that trips up beginners is the mix. Undermixed platinum-cure silicone leaves soft spots and streaky color you won’t notice until the full 24-hour cure is done.
This guide covers all 10 steps for round beads, novelty shapes, and sizes from 10mm to 19mm. It also explains which silicone grades and pigments are safe for baby-facing projects versus keychains.
Below, the tutorial starts with material choice and workspace safety, then walks through the full pour sequence.
How To Make Silicone Beads Tutorial
The process is simpler than it looks once you have the mix-pour-cure rhythm down. I’ll walk through material choice, safety, and the 10-step pour sequence I use for teething necklace and keychain projects.
Why Silicone
Food-grade platinum-cure silicone is the only material I use for jewelry projects. It holds pigment well, cures to a soft flexible finish, and unlike latex alternatives it doesn’t degrade from baby saliva or everyday handling.
Hardware store silicone caulk is a hard no for anything baby-facing since the solvents in it don’t belong near skin.
The silicone I reach for most often is a Shore 30A platinum-cure rubber from Smooth-On. It is forgiving on mix ratios and stays soft enough to demold round shapes without tearing.
Shop for silicone by the Shore hardness rating on the product page. Anything softer than Shore 20A tears too easily under teething pressure, and anything harder than Shore 40A feels more like a rubber stopper than a bead.
Buying from Smooth-On, Amazing Mold Putty, or a specialized craft supplier gives you proper data sheets so you know exactly what you are working with. Amazon listings for generic two-part silicones rarely include a full material spec, which matters when the finished bead is going in a baby’s mouth.
Always check the cure system. Platinum-cure silicone is non-toxic once set and is the right choice for anything touching skin, while tin-cure silicone releases a small amount of residue during cure and is better kept to casting-only projects.
Pigment matters too. Stick to silicone-specific dyes like Silc Pig so the color bonds into the rubber rather than streaking out later.
Two to four drops per ounce of silicone is usually plenty to hit a strong color without slowing the cure.
Safe
Food-grade and medical-grade silicone beads are generally considered hypoallergenic when sourced from a reputable supplier. They resist mold and bacteria growth far longer than rubber or latex equivalents, which is why they end up in baby products.
I still recommend confirming the FDA-compliance language on the data sheet before pouring any batch headed for a teething necklace.
The one thing I always do before shipping a finished piece is wash it with mild dish soap, rinse it in hot water, and let it air dry overnight.
Easy to Clean
Cleanup is simple compared to wooden or porous beads.
Warm water with a drop of dish soap handles everyday washing, and most silicone beads survive the top rack of a dishwasher without warping.
I wash teething necklaces every few days during active use since baby hands find every surface on the floor.
Increased Awareness and Engagement
Teething necklaces sit on the parent, not the baby, so the child reaches for the caregiver during chewing. That built-in eye contact is one of the reasons these beads stay popular even as other teething products come and go.
It is also why color and shape variety matter so much when you are making your own.
Versatile
A nice trick for sore gums is to toss the finished teething necklace in the fridge for 15 minutes before use.
The silicone holds the chill for a surprisingly long time and soothes swollen gums. Just avoid the freezer, which can make the rubber brittle and painful to bite.
Fashionable
A plain rubber teether is not something most parents want to wear in public.
A custom silicone necklace in your favorite color palette looks more like jewelry than a baby product, which is why DIY pieces often outlast store-bought options.
When you pour your own, you get to pick the exact tones, patterns, and shapes instead of settling for the generic rainbow packs in craft stores.
If you would rather shop than pour, look for bead suppliers that publish full material data sheets with every listing.
The baseline to insist on: BPA-free, PVC-free, phthalate-free, lead-free, and cadmium-free. Anything short of that list is not going anywhere near a baby in my house.
Silicone Beads
If you are selling DIY necklaces on Etsy or at craft markets, the math on pouring your own versus buying wholesale beads changes fast once you hit volume. A single two-part silicone kit in the ten-dollar range yields enough material for dozens of beads.
That said, wholesale silicone beads make sense when your time is more valuable than the per-bead savings.
Once you are filling twenty or thirty necklace orders a week, the time spent mixing, pouring, and curing your own starts to eat into your margin.
At that point, bulk buying from a dedicated silicone bead supplier frees you up to string, finish, and ship instead of standing at the mixing table.
My rule of thumb: pour your own for the first hundred pieces while you learn the craft, then switch to a mix of wholesale plain beads and hand-poured signature beads once orders start stacking up.
That hybrid approach gives you custom color stories your competitors cannot match without killing your shop’s turnaround time.
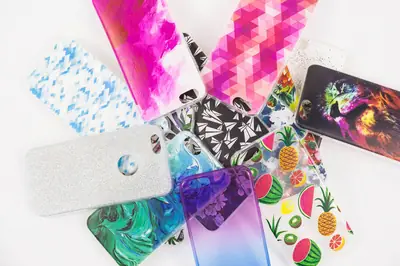
Patterned silicone beads (marble, zebra, pink sorbet) are worth mentioning here because they are tricky to replicate at home without the right mold system.
Solid-color beads come from a straight pour into a simple bead mold and are the easiest starting point.
Marbled effects come from loosely swirling two or three colored mixes together, pouring before they blend, and letting the stir pattern set into the rubber.
Factory-made patterned beads use a thin chemical-resistant wrap film to line the mold before the pour, which gives them that sharp repeatable pattern no hand pour can match.
At home, I stick to either solid colors or swirled marble effects and leave the wrap-film work to commercial suppliers.
Anything beyond two-color marble tends to come out muddy if you over-stir, so keep the colors contrasting and the swirl count low.
For store-bought patterned beads, check the supplier’s data sheet for chemical testing so you know the wrap film and pigment are food-safe.
I have seen wrap films wrinkle inside cheap molds and leave a bead with a weird matte streak across one side, so price is not the only thing to look at.
Stick with known brands for patterned beads and you will not regret it.
Always confirm the chemical testing paperwork from your supplier.
Pattern slippage happens even at large factories, so inspect every batch you receive and reject any that look streaky or off-shade.
A poorly sealed wrap layer can peel away months later, leaving you with a complaint you did not see coming.
Silicone Beads Artwork
Beyond teething necklaces, silicone beads turn up in bookmarks, keychains, pen wraps, and bracelet kits that parents can make with kids as a craft activity.
Craft kits that pair beads with nylon string and breakaway clasps are a great first project for anyone who has not tried the hobby before.
A single kit usually has enough supplies for two or three finished pieces.
If you are making these with kids in the room, skip the drilling-your-own-holes route and use beads that come pre-drilled.
Pre-drilled beads string up fast and avoid the hassle of pushing a needle through cured rubber, which rarely goes well on the first try.
Most kits ship in single or double sets, and the double versions are the practical pick if you have more than one kid who wants to make their own at the same time.
Process To Make Silicone Beads
A beaded teething necklace is one of the quickest custom baby gifts you can put together.
If you can string beads, you can make one.
The safety bits are the part most crafters overlook.
Any teething necklace must use a breakaway clasp so it pops open under pulling force, and every bead needs to be tied down with a knot between it and the next bead so a single break does not release a string of loose beads.
Once the bead stash is prepped and the clasp is ready, a full necklace goes together in about ten minutes.
They make great favors for baby showers once you have the production rhythm down.
Bead count depends on your bead size and desired necklace length. For a standard 80cm nursing necklace, plan on about 35 to 45 beads in the 15mm range or closer to 50 to 60 beads if you are using 10mm beads.
Pad the count up by a handful so you can swap out any beads that came out with visible air bubbles or off-color streaks.
A wooden or non-silicone stopper bead on either side of the clasp gives you a solid anchor point for knots, since silicone is too slick to hold a clean knot on its own.
DIY Beads Ideas
Double-hole silicone beads are a useful shortcut for projects where you want a cleaner, more structured bracelet style.
They give you two parallel strands instead of one, so the bracelet holds its shape without collapsing when worn.
Selling at holiday craft fairs pushes your bead production up fast.
Plan a cure schedule that puts batches in molds overnight so you wake up to ready-to-demold beads every morning.
Holiday shoppers pay a premium for handmade teething necklaces, so it is also when your silicone investment earns its best margin.
Early November fairs fill up quickly, so lock in booth space and start stockpiling beads at least six weeks in advance.
Nothing is worse than selling out of inventory on day one of a three-day fair.
Buying your base silicone and pigments in bulk well before the rush keeps the cost per necklace low and the cure schedule predictable.
Teething babies will chew on anything in reach, so a silicone necklace is the safer default compared to wooden beads or plastic rings.
The soft give of the rubber also feels better on sore gums than any solid material.
A custom palette lets you match your wardrobe while keeping the piece fully baby-safe.
Store-bought silicone jewelry is rarely cheap and the color options are limited, which is why DIY wins as soon as you have a specific aesthetic in mind.
One hand-mixed batch gives you a full necklace in a palette no one else has.
String the beads onto nylon cord in whatever mix of tones, shapes, and sizes you like.
Tie knots on either side of each bead if you want them to stay spaced out along the cord.
Quick tip:
Run the nylon cord through a block of beeswax a couple of times before stringing to keep the end from fraying.
Twist the waxed end between your thumb and forefinger to stiffen it into a makeshift needle.
Silicone Teething Techniques
Cut the cord to length once all the beads are on. An 80
to 85cm finished length is the sweet spot. Long enough for comfort, short enough that a pulling baby does not yank you off balance.
Thread each side of the breakaway clasp onto the ends of the cord, slide them back a few inches, then tie a secure knot at each end.
Slide the clasp halves back over the knots so each knot sits hidden inside the clasp housing.
Double-loop the knot so the breakaway clasp stays anchored.
A second knot just inside the first bead stops the whole string from bunching to one side of the necklace.
Important reminder: teething necklaces are meant to be worn by the parent, not the baby. Never leave a child unattended with one around their own neck.
Whichever supplier you use for beads or raw silicone, insist on full material transparency.
Safety data should not be a line you have to dig for.
Anything you use should be BPA-free, PVC-free, phthalate-free, and verified free of lead, cadmium, and other heavy metals.
If you are moving from stringing store-bought beads to actually pouring your own, the mindset shifts a little.
Silicone molds work since silicone sticks to practically nothing other than silicone, which is why knowing how to use silicone molds properly saves effort later.
That same release property is why silicone is the standard material for food molds and why home crafters can reuse a bead mold dozens of times without losing detail.
What To Consider
For silicone beads specifically, your mold has to be made from a non-silicone material (typically urethane, polyurethane, or a hard plastic) so the cured bead releases cleanly.
The through-hole in the middle of each bead adds a wrinkle, but it is manageable.
For round beads with a through-hole, you need a two-part mold with proper venting so air escapes as silicone fills the cavity.
If you can live with a faint seam line, two half-molds poured separately and pressed together work just fine for DIY use.
My advice skews toward small beads in the 10mm to 15mm range, since larger sizes are considerably more forgiving.
You will need a master bead (or a printed bead shape) at the size you want to reproduce.
Any non-silicone mold needs a light coat of mold release before the silicone goes in.
Tiny beads are unforgiving and you should not expect every single cavity to come out perfect on your first pour.
Start with a flat bed of modeling clay, leveled as carefully as you can manage.
Press the master beads halfway into the clay with their through-holes oriented vertically.
Add a few alignment keys (clay bumps, pyramids, or cones) around the bed.
Tapered shapes release more cleanly than straight-sided ones.
Watch out for: any undercut on the alignment keys will make demolding a nightmare, so keep those shapes simple.
Spray the beads and clay surface with mold release.
Build a small containment box around the clay bed so the mold material has somewhere to pool.
Pour a urethane or acrylic resin to cover the beads and alignment keys.
Once cured, flip the whole thing over and remove the clay bed, leaving the master beads still seated in the first half of the mold.
Clean everything and reapply mold release to the cured half and the exposed top of each bead.
Rebuild the containment box, pour the second half of the mold, and let it cure the same way.
Once the mold is split and cleaned, pouring silicone into it will form your finished beads.
A simpler trick is to fill one mold half flush with silicone and let it cure.
Do not touch the cured surface with bare hands since fingerprints can interfere with the next bond.
Fill the other half with fresh silicone and press the top mold half onto it while the new pour is still wet.
The fresh silicone bonds to the cured half and forms a seamless bead.
You may see a faint seam line depending on how much silicone squeezed out, but a quick trim with a razor blade cleans that up.
For very small beads, a full two-part mold with sprue and vent tends to produce too many rejects for the effort.
The seam-style approach is more practical for most home crafters working with sub-20mm beads.
The tricky part is making sure the clay fills each bead’s through-hole so the hole actually ends up in the finished bead.
Cleaning every trace of clay out of those channels before the second pour is just as important.
Any mistake there leaves you with a bead that has no hole to string through.
There is a simpler method I have used for bulk projects.
Here is how I would adapt the process.
Put Your Beads on a Wire
Cut a straight piece of wire from an old coat hanger to string your master beads on.
That gives every bead its through-hole in a single step instead of trying to preserve each one individually.
Cut the wire to match the length of your containment dish.
That way the wire passes straight through the whole mold rather than stopping short inside it.
I would skip the clay base entirely for this approach.
Clay rarely captures fine detail at small scales.
You end up with pits and streak marks on the finished beads.
If you would rather outsource the actual pouring, find a silicone bead maker that accepts custom orders.
Send them your design sketches or reference images.
A typical custom flow runs: 3D render, mold build, color match, sample batch, approval, then mass production.
The big advantage of silicone beads over any alternative: they clean up with a drop of mild soap and water.
Proper food-grade silicone is the same stuff that pacifiers and baby bottle nipples are made from, which is why it is trusted for anything headed into a baby’s mouth.
It also resists mildew and bacteria growth, which is more than I can say for wooden beads that inevitably pick up spots after weeks of saliva exposure.
One warning about the wire-through-beads method: silicone can still grab the wire even with release spray.
Use a heavier gauge wire so the mold holds its shape if you have to flex it slightly during demold.
A two-part acrylic casting kit from the craft store works well as the mold material.
These are sold in the cake decorating or floral craft aisle and set up clear enough to spot air bubbles.
Coat your beads-on-a-wire with a thin layer of vaseline and grease the inside of your Tupperware dish too.
Fill the dish halfway with acrylic, then drop your wire of master beads in so they sit half-submerged.
Let the first half set fully.
Grease the exposed acrylic surface with vaseline, then top up the dish with a second batch of acrylic to bury the beads completely.
Silicone Beads
The finished teething necklace should feel soft on infant gums and hold up to daily chewing without cracking.
Everything from material choice to finishing touches should support those two goals.
Use 100% food-grade silicone, check for FDA-compliance language, and wash finished pieces thoroughly before first use.
Skip any silicone product that does not publicly confirm it is free of BPA, PVC, phthalates, cadmium, and lead. Once those basics are nailed down, the actual pour is fast and rewarding.
How to make silicone beads?
With those basics covered, here are the ten steps I follow for a home pour.
Here are 10 Simple Steps How To Make Silicone Beads
Step 1:
Measure equal parts of your two-part silicone (Component A and Component B) into separate cups.
Most brands run a 1:1 ratio by volume or weight, so a kitchen scale keeps things simple.
Fold the clay into a ball with your hands.
Step 2:
Grab your silicone pigment, stir stick, and clean molds so they are staged and ready before the mix starts.
Fold the clay into a ball with your hands.
Platinum-cure silicone typically gives you a working window of three to six minutes, which is not much, so staging saves you from scrambling.
Step 3:
Combine Part A and Part B in a single clean cup and stir until the two colors blend into one uniform tone with no streaks.
Scrape the sides and bottom of the cup at least twice. Unmixed pockets along the rim are the number one cause of soft spots in finished beads.
Keep the full stir under two minutes so you still have working time left for the pour.
Add silicone-specific pigment once the base mix is uniform and stir for another thirty seconds until the color is even.
Step 4:
Place your bead mold on a flat, level surface so the cavities fill evenly without pooling to one side.
A bubble level under the mold takes thirty seconds and saves you from lopsided beads that no amount of trimming can fix.
Step 5:
Slowly pour the mixed silicone into each cavity, filling from one corner so air can escape rather than getting trapped beneath the surface.
Pouring from high up with a thin stream encourages bubbles to break as the silicone drops into the cavity.
Once the cavities are full, gently tap the mold against the table a few times to coax any trapped bubbles to the surface.
A vacuum chamber is the gold-standard upgrade here and pays for itself after a few retail-quality batches, but the tap method works fine for home use.
Leave the mold alone for the next several hours to let the silicone begin setting up.
Step 6:
After the initial demold window (usually four to six hours for most platinum silicones), the beads are firm enough to handle but not yet at full strength.
Leave them to fully cure for a full 24 hours before stringing.
A warm room will knock an hour or two off the cure time. A cold garage can add several hours.
Watch out for: never put a silicone pour inside an oven unless the manufacturer explicitly states it is oven-safe for cure acceleration. Most household brands are not.
Step 7:
Demold the finished beads by flexing the mold away from each cavity.
Silicone molds are designed to peel back without tearing, so the beads should pop out with light pressure from underneath.
If a bead resists, work it free with a light twist rather than pulling on it.
Step 8:
Inspect each bead for air bubbles, flash (thin excess silicone around the seam), or soft spots.
A sharp craft blade trims away flash in seconds, but bubbled or soft beads should go in the reject pile.
Never sell a questionable bead. Retail buyers are unforgiving and one soft bead ruins an otherwise strong batch.
Wash the finished beads in warm water with mild dish soap, then let them air dry fully before handling.
Step 9:
This washes away any release residue, dust, or handling marks from the demold process.
For baby-facing projects, I wash twice and let the beads dry overnight.
String the finished beads onto nylon cord, add a breakaway clasp, and tie the anchor knots on either side as described earlier.
A beeswaxed cord tip acts like a makeshift needle and pushes through the bead holes more easily than a bare nylon end.
Step 10:
Final inspection before the first wear or sale.
Tug firmly on the clasp and each knot to confirm nothing will slip under baby-grade pulling force.
Give the finished necklace a final warm water rinse and pat it dry.
If you are selling your work, photograph each finished piece on a clean background while the beads still look freshly washed.
You have now made your first batch of DIY silicone beads ready for jewelry projects.
A few optional tricks for cleaner pours:
A light mist of cooking spray on a clear acrylic mold helps the cured beads release without sticking.
For deeper molds, a marinade injector lets you fill each cavity more precisely than pouring from the mixing cup.
It is especially useful for narrow or tall bead shapes where air bubbles would otherwise get trapped.
Clear acrylic molds let you watch the fill level, which takes the guesswork out of knowing when each cavity is actually full.
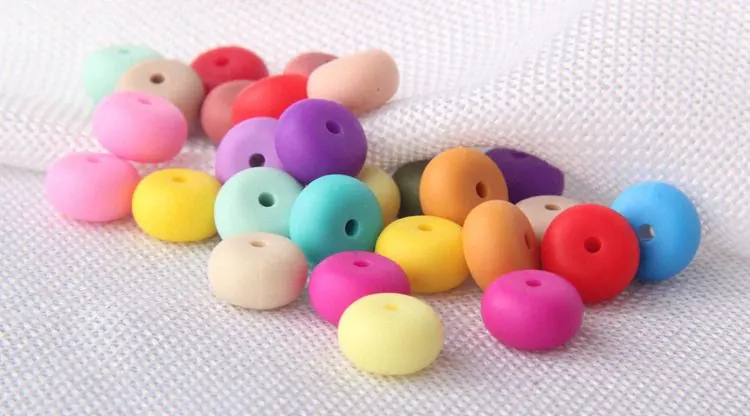
Common bead mold sizes include 10mm, 15mm, and 19mm rounds. Smaller beads string cleaner for delicate necklaces, while 19mm beads give teethers a satisfying chew size.
Novelty molds (rabbits, mushrooms, hearts, letters) are widely available once you outgrow plain rounds and want to branch into seasonal or themed projects.
Frequently Asked Questions
Are homemade silicone beads safe for teething babies?
Only if you start with certified food-grade or medical-grade silicone from a trusted supplier like Smooth-On or a baby-specific brand and follow the manufacturer’s curing instructions exactly. Never use hardware store silicone caulk since it contains solvents and plasticizers that are not skin safe, and always look for explicit FDA-compliance on the product data sheet.
What pigments can I safely use to color silicone beads for jewelry?
Silicone-specific pigments from brands like Smooth-On’s Silc Pig are the safest and most reliable choice because they bond chemically with the cured rubber and won’t leach out over time. Regular craft paints and food coloring will streak, refuse to mix evenly, or bleed out of the finished bead after curing.
How long does it take for silicone beads to fully cure before I can string them?
Most two-part platinum-cure silicones reach demold stage in four to six hours and full cure in about 24 hours at room temperature. Avoid handling, drilling, or stringing freshly poured beads until the 24-hour mark so the rubber reaches its full strength.
Can I drill holes in silicone beads after they cure, or do I need molds with built-in holes?
Both methods work, but molds with built-in posts or through-holes give cleaner, more consistent results every time. Drilling cured silicone is doable with a sharp bit and slow rotation speed, but the rubber tends to grab the bit and tear rather than cut cleanly, so go slowly and use a backing surface.
How do I keep my DIY silicone beads from sticking together while curing?
Use separate cavities in a multi-bead mold so each bead cures independently, and never stack molds on top of each other while the silicone is still wet. If you are pouring one at a time, space them out on a flat, level surface in a dust-free area.
Final Thoughts
For first-time bead makers, Smooth-On Ecoflex 00-30 paired with a silicone bead mold from a craft supplier is the easiest starting kit. Ecoflex is forgiving on mix ratios, cures at room temperature, and is soft enough to release cleanly from round or shaped cavities.
Parents making teething necklaces or silicone jewelry for babies must stick to food-grade or medical-grade platinum-cure silicone with no exceptions. Look for explicit FDA-compliance language on the data sheet, hand-wash before first use, and stick to 10mm or 12mm bead sizes for any baby-facing project.
Crafters who plan to sell on Etsy or at markets should consider a small vacuum chamber to pull air bubbles out before the silicone sets. That single upgrade takes your beads from hobby-quality to retail-ready and lets you charge more per finished necklace.
Beyond teething necklaces, silicone beads show up in keychains, pen wraps, bookmarks, and car decorations. The craft grows with your skill, and the upfront cost of a starter kit pays back after a handful of projects.