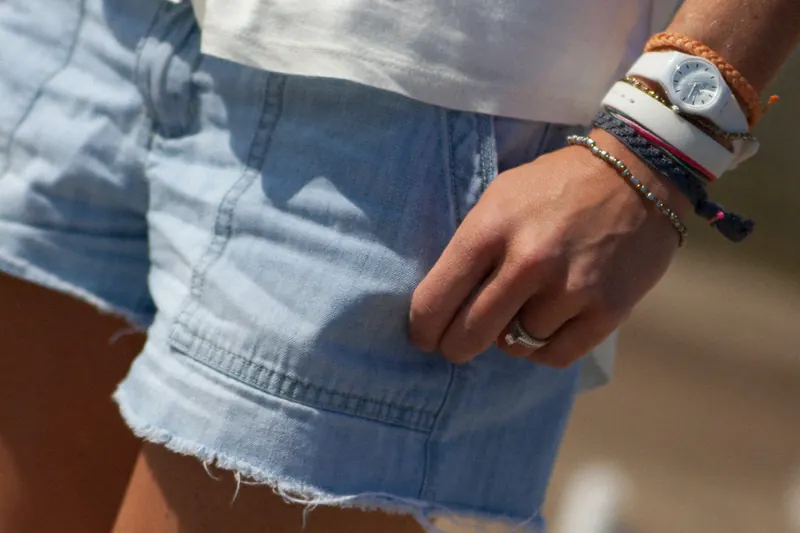
A charity wristband that slides off every time you wash your hands gets old fast, and a silicone ring that fits is just as important for daily wear, especially when the logo is the whole reason you still wear it. Most promotional bracelets ship in one or two adult sizes, so a 5.5 to 6-inch wrist is stuck with a band built for someone bigger.
Silicone does respond to heat, just not dramatically. A 15 to 20 second dip in boiling water followed by an ice bath can tighten the fit by a few millimeters without hurting a debossed or embossed logo.
For a bigger size change, you’ll need to cut the band and rebond it with Sil-Poxy or a similar silicone adhesive. That gives you exact control but can’t be undone.
This guide covers 10 methods, starting with reversible tricks like an elastic-tie cinch and ending with the permanent cut-and-glue approach. The first step below is the one most people skip: measuring your wrist and the bracelet so you know exactly how much material needs to come off.
10 Easy Step Guide On How To Shrink Silicone Bracelets
Here’s the order I’d actually use: measure first, try boiling, try the sewn-in elastic trick, and save cut-and-rebond as the last resort.
Step 1: Measure Your Bracelet and Wrist
Whichever method you end up using, you need real numbers first. Grab a cloth tape measure, wrap it around the widest part of your wrist, and jot down the result in inches.
Do the same for the bracelet so you know the exact amount you’re trying to remove.
You want roughly a one-inch difference between your wrist and the band. A 5.5-inch wrist pairs with a 6.5-inch bracelet, so there’s enough give to pull it over your hand without the band sliding off once it’s on.
Too tight and it pinches. Too loose and it falls into the sink.
That one-inch buffer is the sweet spot.
Step 2: Cut Your Bracelet
Lay the wristband flat next to your tape measure and mark the cut point. I like to put both on a scrap of paper so I can draw a tick at the wrist-length mark, then add one inch past it for the pull-over allowance.
That second tick is where the scissors go.
Worried the band will end up too snug? Add 1/2 inch or 3/4 inch to the measurement instead of a full inch.
Scissors are the fastest way to shorten a band. Use sharp fabric scissors, not the dull kitchen pair that’s been sitting in a drawer for a decade.
Dull blades leave a jagged, wavy edge that’s nearly impossible to rebond cleanly. A craft knife won’t work either since silicone drags and tears against the blade.
Go slow and keep your fingers clear of the cut line.
Step 3: Be Careful Not to Cut Logos and Designs
Now that you know where the cut goes, pinch the bracelet at that exact spot with a fingernail so you can see the mark without losing it. Bring the blade right up to your nail and make one clean, committed cut.
Single-stroke cuts rebond much easier than sawed-through ones.
Watch out for the logo. A printed cause, team badge, or quote is the whole reason you’re keeping this band in the first place, and slicing through the middle of it ruins the look completely.
Plan the cut on the smooth back side of the band, directly opposite the logo or text. When the bracelet sits on your wrist, the seam lands on the underside where nobody sees it, and the front stays picture-perfect.
Once the cut is made, you’re ready for glue. Fine-textured rubber cement is the move here: apply a thin layer to both ends, press them together, and hold steady.
Step 4: After Applying Glue, Leave It For at Least 24 Hours
After you’ve lined up the ends, squeeze them together with steady pressure for a solid two minutes. The point is to set the joint with zero air trapped between the edges, because any trapped bubble turns into a weak spot that pulls apart later.
Skip the craft glue. Elmer’s, Gorilla clear, paper glue, none of it actually bonds to silicone rubber in a lasting way.
Pick up a tube of fine-textured rubber cement or, better, a silicone-specific adhesive like Sil-Poxy. That’s the only stuff that creates a real chemical grip with the band.
A little glue squeeze-out between the pieces is fine: most rubber cements dry clear.
Once pressed, set the bracelet aside and walk away. Twelve hours is the minimum, 24 is safer.
Silicone adhesives follow the same cure timeline as silicone caulk.
The glue may feel tacky after an hour, but it won’t hit full strength until the next day, and stretching it onto your wrist early is a quick way to tear the joint apart.
Step 5: Drying Precautions
Set the bracelet in a warm, well-lit spot and let it cure undisturbed. A sunny windowsill works well because the extra warmth and light speed the process along, and you’ll be back in your bracelet sooner.
Do not trust the surface feel of the glue. It can feel dry to the touch within an hour but still be weak underneath, and it won’t reach full holding strength until a full 24 hours have passed.
In a real hurry? A couple of minutes of warm air from a hair dryer at the start can help kick the cure along, but it’s no substitute for letting the bond sit overnight.
Step 6: You Can Also Boil Your Bracelet
Don’t want to cut? Boiling is the non-destructive route.
Silicone is a heat-resistant, non-flammable material, so a quick plunge in hot water won’t damage the band, distort the print, or weaken the rubber itself.
A minute or two in a rolling boil sits well within the material’s safe range.
The band comes out the same strength it went in, even after a minute or more of boiling.
Fill a pot with enough water to fully cover the bracelet. Any kitchen saucepan you’d use for pasta works fine, though skip the one you just cooked marinara in unless you’ve scrubbed it.
Crank the burner high and wait for a real rolling boil before the bracelet goes in.
Just about any saucepan does the trick.
Place Your Bracelet into Boiling Water
Once the water is rolling, use tongs to lower the bracelet in gently. Never drop it from height since boiling water splash can burn your hand in a second.
Let it sit submerged for roughly 15 to 20 seconds.
If the band is way too big, push it to 25 or 30 seconds instead.
Longer time in the hot water means more shrinkage, within limits.
A stopwatch helps here, but counting “one-Mississippi, two-Mississippi” is accurate enough if your phone is across the room. The exact timing matters less than the ice dunk that follows, so don’t stress about a couple of seconds either way.
Take It Out Of The Pot and Dry It Completely
Do not reach in with your bare hands. Use tongs to lift the band out, let it drip for a second, and place it on a clean cloth dish towel.
Press gently to wick away water if you’re in a hurry.
Skip paper towels since the fibers cling to warm silicone and leave lint on the band. A hair dryer is also not great for this step; let the band air-cool instead.
Rinse the saucepan afterward with dish soap and warm water before using it for food again.
Step 7: Try It On Your Wrist
Boiling is the fastest shrink method, and the fit test is the moment of truth. Let the bracelet cool until it’s comfortable to touch, then slide it onto your wrist and see how it sits.
Still loose? Back into the pot for another 15 seconds, another ice dunk, another check.
Repeat the cycle until the band actually grips. Just know that each round delivers smaller returns than the last.
In Case Of Over-Boiling The Bracelet
Left it too long and now the band is too tight? It happens.
Everyone gets distracted at the stove eventually.
Here’s the rescue for a band that came out too tight.
Loop the bracelet over a sturdy doorknob and stretch it, pulling with steady hand pressure.
Fifteen or twenty seconds of stretch followed by a fit test usually loosens things back to wearable.
Silicone is tough enough that normal hand stretching won’t tear it.
Worth repeating: boiling does not weaken silicone. The material is heat-resistant by design and holds its structure at temperatures most kitchens never come close to.
An over-shrunk band responds well to a doorknob stretch followed by a cool-down on a flat surface.
The rubber is solid enough that hand pressure won’t break it.
Boiling water doesn’t weaken the band, either. Silicone doesn’t melt easily and stays stable up to 446°F (230°C).
Shrink away without worrying about damage.
Step 8: Use Elastic To Adjust The Size
An elastic hair tie or rubber band is a cheat code for quick size adjustment. Most people already have one kicking around a drawer, and if you don’t, a bag costs pocket change at any drugstore.
To do that, tie the extra material of the silicone bracelet with an elastic band.
First, you need to take your bracelet into your hand and then pinch the extra rubber into your hand.
Be careful to not pinch too much material into your hand.
Be sure it’s proportionate to your wrist size.
Do it, until it starts to fit your wrist completely.
Next, you need to tie an elastic band around the pinched material of the silicone bracelet.
Once you have put the bracelet on your wrist, you can adjust it so that the elastic band is not visible.
The side of the silicone bracelet where you have tied the elastic band should not be put on the upper part of your arm as it would look odd and shabby.
Style it in a way that the elastic band is not visible, now you can flaunt your favorite bracelet.
Step 9: Simple Attachment Method
There are always a couple of ways to get a task done.
To shrink your silicone bracelet, you can utilize various ways to match your size.
There is another simple yet effective method you can adopt to make your bracelet smaller.
For this technique, you need yarn and an embroidery needle.
First of all, thread a needle with yarn.
Then poke a hole through one end of your silicone bracelet, stretching it to the other, and pull the yarn through the hole in the bracelet.
To keep the strands firmly held together, measure and tie the knot.
You need to repeat this step about two to three times.
Secure your bracelet by firmly tying the strands of thread/yarn together.
After getting done with this method, try it on your wrist.
If it still feels loose, you can try some other method. I.e boiling the bracelet.
But to avoid any mishap, you must measure your wrist and bracelet in advance to get the required size.
Step 10: Try Jewelry Clasp Method
This method also requires a needle and a thread.
In addition to this, a jewelry piece like a jewelry clasp to hold the ends of the bracelet together.
First of all, poke a hole through one end of the bracelet to the other end.
Enclose the strands of the yarn with the help of a cord crimp which should be positioned near the end of the bracelet.
After doing this, place the bracelet on your wrist and secure it by attaching one clasp with the loop of the second clasp.
This technique is a bit tricky and time-consuming.
Some people would find it complicated so for them boiling the bracelet should be the first priority method.
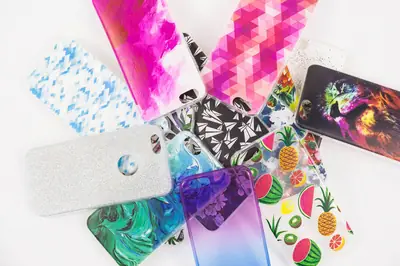
Elastic or Silicone Wristbands
A quick note on why silicone wristbands vary so much in fit.
Most fundraising and promotional bands are manufactured in one or two stock adult sizes because producing multiple sizes would kill the cost efficiency of the run.
That is why you often end up with a band that is technically adult-sized but too loose for an actual adult wrist.
Kids, smaller adults, and narrow wrists end up on the losing side of that sizing compromise almost every time.
Knowing how the band was made helps you pick the right shrinking method.
Silicone wristbands are injection molded around a printed logo or text, which means that area of the band is dense and does not respond to heat the way the plain sections do.
That is why boiling typically shrinks the back half more than the logo area, and why planning your cut away from the logo matters so much if you go the rebond route.
Custom Text and Colors
Knowing the print style on your own bracelet also helps with damage control during shrinking.
Here is how the common print methods react to heat.
Debossed and embossed prints are molded into the silicone itself and are the safest for boiling since the design cannot flake off.
Screen-printed or ink-filled debossed designs are slightly more delicate. Watch out for: test a small spot with hot water before committing to a full boil.
The most common styles you will run into: debossed (text stamped into the band), embossed (raised text), screen-printed (surface ink), and color-filled debossed.
Of those, debossed and embossed are the most forgiving when you are boiling or stretching.
Embossed letters stand proud of the band surface and survive heat treatments without distortion.
Both methods create the logo during the original molding rather than printing it on afterward.
Color-filled debossed bands have paint pressed into the recessed letters for contrast.
Screen-printed text sits on the surface of the band and is the most at risk of smudging or fading during boiling.
If you have a screen-printed band, avoid the boil method and go straight to the cut-and-rebond or elastic tie approach.
A dry run with a second identical band is the safest way to test how your specific bracelet responds to heat if you have one to spare.
Bright solid colors tend to hold up to boiling better than glow-in-the-dark or metallic bands, which use pigment additives that can react unpredictably to sustained heat., makers give a wide scope of various shading decisions.
Marbled or segment bands with multiple colors are still safe to boil as long as the base silicone itself is uniform.
One more reality check: if your band is a cheap promotional giveaway, it is worth trying the DIY shrink before buying a replacement.
The worst case is that a free band gets a little too tight and you are out exactly zero dollars.
If the band is a keepsake (charity, memorial, or limited edition), commit to measuring twice and testing on a scrap piece first.
Irreplaceable bracelets deserve the cut-and-rebond approach rather than boiling, which gives you exact size control with zero risk of damaging the print.
Use Sil-Poxy or a medical-grade silicone adhesive for the rebond and leave the seam on the inside back of the wrist where it is not visible.
Frequently Asked Questions
Does boiling a silicone bracelet actually shrink it, or is that a myth?
Boiling does shrink silicone bracelets slightly, usually by a few millimeters at most, because the heat causes the polymer chains to contract temporarily. A full 15-minute boil followed by an immediate ice water dunk is the standard method, and while the results are modest, it’s often enough to tighten a band that’s just slightly too loose.
Can I cut a silicone wristband and glue it back together to make it smaller?
Yes, and it is the most reliable way to achieve a custom fit. Cut a small section from the back of the bracelet opposite any logo or print, then bond the ends together with silicone-specific adhesive like Sil-Poxy or a medical-grade cyanoacrylate.
Will shrinking a silicone bracelet ruin the printed logo or design?
Boiling and ice water generally preserve printed logos as long as the print was cured properly during manufacturing, though very cheap screen-printed bands can see some fading. Debossed or embossed designs are the safest since the logo is molded directly into the silicone itself and can’t wash off or peel.
What’s the safest way to shrink a silicone bracelet without damaging it?
Hot water with a careful temperature and timing is the safest approach because it doesn’t involve cutting, glue, or sharp tools. Heat a pot of water just to a boil, drop the bracelet in for 10 to 15 minutes, then transfer immediately to ice water for a full 30 seconds.
My silicone bracelet stretched out over time, can I shrink it back to its original size?
Silicone can stretch slightly with daily wear, especially if the band is pulled on and off constantly over the wider part of the hand. A boiling water treatment often restores some of the lost tightness, though it likely won’t bring the bracelet all the way back to its original factory size if the stretch has been significant.
Final Thoughts
First-timers should start with the hot-water-and-ice-bath route. It is the lowest-risk option and handles a band that is one size too big without any tools, glue, or irreversible damage.
If boiling does not cinch the fit enough, cut-and-rebond is your next step. Sil-Poxy or a medical-grade silicone adhesive is the right choice, and anyone with small wrists or kids should get comfortable with the technique since it gives full size control.
Parents shrinking wristbands for kids should stick with boiling and watch the process closely, since hot water and tongs are real burn risks for little hands. Charity organizations and event planners handing out branded bands can usually offer a smaller size on request, which saves the DIY trip entirely.
None of these fixes are perfect because silicone is engineered to resist heat and deformation, so you are working against the material’s design. Keep your expectations grounded and you will still get a noticeably better fit from a band that might otherwise live forever in a drawer.