Custom molds for jewelry, prop helmets, and resin casts all start the same way: you mix two liquid parts, pour them into a box, and wait for the silicone to cure into flexible rubber. A good mold captures fingerprints, wood grain, and tiny surface details.
That’s nothing like the silicone caulk tube in your garage. Caulk skins over and seals a gap, while pourable silicone stays liquid long enough to fill every corner of a mold before it sets.
The real draw is durability. A well-made silicone mold handles hundreds of casts before it tears.
This guide explains what pourable silicone is, how it differs from regular caulk, and four budget-friendly DIY mixing methods you can try at home. The first section below covers where silicon (the raw element) comes from, so the chemistry behind the mixing methods makes more sense.
The Origin Of Silicon
Despite what the name might suggest, silicon does not actually come from Silicon Valley.
It comes from sand.
Silicon is a naturally occurring element, and it makes up to 25% of the Earth’s crust, making it the second most abundant element on our planet after Oxygen.
Silicon is commonly found in sand combined with other minerals, so it’s rare to find it in its pure form.
The Difference Between Silicon And Silicone
Silicon is a chemical element that bonds readily with oxygen molecules to form silicon dioxide, also known as quartz.
To get silicon in its pure form, you have to remove the oxygen by mixing it with carbon and heating it in a furnace above 2000 degrees Celsius. The carbon reacts with the oxygen in the quartz and converts it into carbon dioxide, leaving pure silicon behind.
Silicone, on the other hand, is a synthetic rubber-like polymer that contains silicon, oxygen, carbon, and hydrogen. It can be found in solid, liquid, or gel form.
How To Extract Silicon From Silica Sand
Silicon extraction from sand is industrial chemistry, not a home project. I mention it here only so you understand why the finished silicone compounds you buy cost what they cost, since refining silicon from quartz is energy-intensive work.
Chemical Elements Used to Extract Silicon from Silica Sand
Do not attempt this process at home. Hydrofluoric and sulfuric acid are dangerous, and the refinery setup is not garage-shop-friendly.
The ingredient list and process notes below are for context only, not a recipe to follow.
- Sand
- Sodium hydroxide
- Distilled water
- 3M hydrochloric acid
- Sulfuric acid
The measurements will vary depending on the amount of silicon you need to extract.
Sand from the beach contains organic matter, foreign particles, various minerals, and silica particles or quartz (silicon dioxide).
Silicon dioxide is a combination of silicon and oxygen.
When you examine sand closely, you’ll notice particles that differ in size, color, and texture. The colorless, clear crystals are the silica particles that need to be extracted.
Now, let’s talk about how you can make your own silicone at home.
Procedures Used To Isolate Silicon From Silica Sand
- Wash the sand in distilled water to eliminate organic matter and foreign particles
- Add hydrochloric acid to the clean sand to remove soluble impurities like calcium carbonate. Bubbling will occur from the acid reacting with the carbonate
- Swirl the components in a flask to ensure a thorough reaction
- Decant the acid from the flask and separate it from the sand
- Wash the sand repeatedly with distilled water to remove any remaining acid
- Spread the sand out in the sun and allow it to dry
- Transfer the dried sand into a stainless steel vessel and heat it
- Add sodium hydroxide to the sand while continuously stirring until the water evaporates. The sodium hydroxide reacts with silicon dioxide to form sodium silicate (NaOH + SiO2 = Na2SiO3 + H2O), and it may take 40 to 50 minutes for the water to fully evaporate
- After the water evaporates, immediately transfer the solution into a separate porcelain bowl to prevent it from solidifying. This gives you a crude sodium silicate
Use stainless steel vessels and spatulas for heating and stirring because stainless steel is a poor conductor of heat.
Extraction Of Silicone From Sodium Silicate
After getting your sodium silicate from the sand you will need to:
- Add small amounts of distilled water to the cooled sodium silicate while constantly stirring to dissolve it into a sodium silicate solution
- Filter the sodium silicate solution to remove any undissolved particles using the Gravity Filtration Method
- Add concentrated sulfuric acid while stirring, which leads to the formation of silicic acid
- The silicic acid appears as a white precipitate (Na2(SiO2)7 + H2SO4 = 3.3SiO2 + Na2SO4 + H2O). The concentrated acid and alkaline solution are highly corrosive, so handle them with extreme care
- Filter the solution to separate the liquid from the precipitate. A cotton cloth works well because the precipitate can be slimy and slippery
- Heat the silicic acid at high temperatures for about an hour to decompose it into silicon dioxide
- Grind the silicon dioxide powder into small, fine particles
What Is Pourable Silicone?
Now that you know what silicone is and how it’s extracted from silica, here are the different ways to make pourable silicone using products readily available at hardware stores.
Pourable silicone is simply silicone in its liquid form. Most silicone is sold in gel or solid form, and buying it pre-mixed in liquid form can be expensive.
Thinning down solidified silicone reduces its viscosity and makes it pourable for mold making. Below are the most budget-friendly ways to make your own DIY liquid silicone.
DIY Pourable Silicone
There are several methods for making your own liquid silicone. Here is the first.
Using 100% Acetic Acid Cure Silicone and Naphtha
Materials
- A ziplock bag for mixing the two ingredients
- Gloves to protect your hands from the corrosive solvents
- A tube of 100% acetic acid cure silicone
- A can of naphtha
- Corn starch to speed up the curing process
Procedures
- Pump the 100% acetic acid cure silicone into the center of the ziplock bag
- Add the naphtha and work the mixture for at least 15 minutes to fully thin the silicone and break up any lumps. Naphtha is highly flammable, so handle and dispose of it with care
- For a thinner, runnier consistency, add more naphtha. For a thicker result, add more silicone
- The finished mixture should have a smooth, pastry-like consistency
- The liquid silicone may take more than 24 hours to cure. Adding cornstarch shortens the cure time to about one hour
- Pour the liquid silicone into your mold and let it set. Any leftover liquid silicone can be stored and reused
Using 100% Cure Silicone and Mineral Spirits
Materials
- A ziplock bag for mixing
- Gloves to protect your hands from absorbing the solvent
- A mask to protect your lungs from mineral spirit fumes
- Safety glasses to protect your eyes
- 100% acetic acid cure silicone
- A can of mineral spirits (also known as mineral turpentine or white spirit)
- Corn starch to speed up the curing process
Procedures
- Prepare a clean ziplock bag
- Put on your gloves, mask, and safety glasses before opening the mineral spirits. The fumes are strong and will irritate your eyes and lungs
- Pump the 100% cure silicone into the ziplock bag
- Pour in just enough mineral spirit to thin out the silicone
- Work the two components thoroughly until completely mixed with no lumps
- Add more silicone for a thicker consistency or more mineral spirit for a thinner one
- The liquid silicone may take more than 24 hours to cure on its own. Adding cornstarch speeds the curing process to about one hour
- Your liquid silicone is now ready to pour into any mold of your choice
Using 100% Cure Silicone And Silicone Oil
Silicone oil is a friendlier option because it’s non-flammable and non-corrosive. It’s widely used as a lubricant, hydraulic fluid, and cosmetic ingredient.
Its lubricating properties are also why it shows up in products designed for skin and body tissue contact, including medicine and eye surgery.
Materials
- A ziplock bag for mixing
- Silicone oil
- 100% acetic acid cure silicone
Procedures
- Prepare the ziplock bag
- Pump the 100% acetic acid cure silicone into the bag
- Pour in enough silicone oil to thin out the silicone
- Work the mixture vigorously until the two are fully combined with no lumps
- You should end up with a smooth, pastry-like consistency. Add more silicone oil for a thinner result or more cured silicone for a thicker one
Using 100% Cure Silicone and Paint Thinner
Materials
- A ziplock bag for mixing
- Gloves to protect your hands from the solvent
- 100% acetic acid cure silicone
- A can of paint thinner
- Corn starch
Procedures
- Prepare your ziplock bag and put on protective gloves
- Pump the 100% cured silicone into the ziplock bag
- Pour in enough paint thinner to thin out the silicone
- Mix the two components thoroughly, making sure no lumps form
- Add more silicone or paint thinner depending on how thick or thin you want the result
- Adding cornstarch will thicken the mixture slightly but speeds the curing process to about an hour
- Your liquid silicone is ready to pour into a mold
Those are the four most budget-friendly methods for making your own liquid silicone. You may have noticed that every method uses 100% acetic acid cured silicone, and that’s because the acetic acid cure chemistry is essential for the thinning process to work.
Silicone is usually found in a rubber gel-like state, and it must be catalyzed, vulcanized, or cured to convert to a solid. You can also substitute the 100% acetic acid cure silicone with CopyFlex.
Uses Of Silicone
Pourable silicone can be used to mold simple homemade objects like jewelry, flower vases, cup holders, keychains, soap bars, and fridge magnets. You can also reduce plastic waste by replacing disposable plastic molds with reusable hand-made silicone molds.
Beyond mold making, silicone is woven into nearly every part of daily life, from healthcare to construction.
Healthcare
Silicone resists bacteria, stays unreactive with most chemicals, and is easy to sterilize. It’s also considered biocompatible with human tissue, which is why manufacturers use it in implants and prosthetics.
It shows up in infant care products, medical lubricants, prosthetics, and breast implants.
Personal Care Products
Silicone is a common ingredient in shampoos, conditioners, and other hair treatments because it helps products retain color and shine. In skincare, it creates a silky texture that makes products spread smoothly.
Its non-irritant properties also reduce the white residue and tacky feel in antiperspirants and deodorants.
Household Products
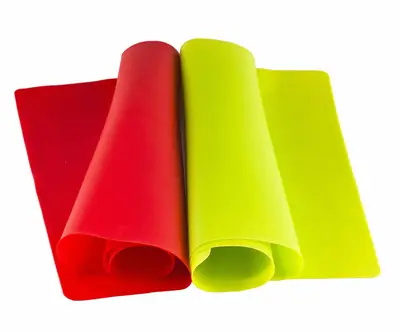
Silicone kitchenware is flexible, long-lasting, and non-stick, which makes it easy to clean. It tolerates extreme temperatures, so silicone bakeware works in a hot oven and silicone containers hold up in the freezer without affecting food quality.
Silicone is also used in fabric softeners to help preserve the feel of new clothing and smooth out wrinkles.
Electronics
Silicone sealants, adhesives, and coatings help electronic components remain protected from shock, moisture, heat, salt, corrosion, and contaminants.
This ensures the long-term stability and performance of mobile phones, computers, cars, and airplanes.
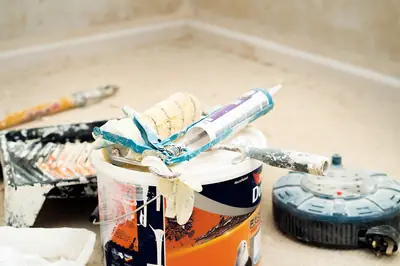
Construction
Silicone sealants, adhesives, and coatings bond diverse materials such as concrete, glass, steel, and plastics during construction, which ensures that the materials stay affixed during stressful movements such as strong winds and earthquakes.
Sealants and coatings protect materials from heat, moisture, sunlight, corrosion, and radiation in buildings.
Sporting Gear
Silicone’s waterproofing properties seal out water in swimming goggles and diving masks, keeping you comfortable during both leisure and competition.
Its anti-slip, lightweight, and breathable qualities also make it a popular material in athletic gear and sportswear.
Advantages Of Silicone
Biocompatible
The inert composition of silicone is why manufacturers use it in personal care products and food-grade applications.
Environmentally Friendly
Silicone is more environmentally friendly than plastic because it’s chemically inert and derived from abundant natural materials like sand. For anyone looking to reduce plastic use, silicone is a durable and reusable substitute.
Extreme Temperature Resistance
Silicone can tolerate extremely high temperatures with a maximum limit of 305 degrees Celsius while still maintaining its structure and properties.
Silicone also withstands extremely low temperatures without losing its flexibility and elasticity.
Sealant Properties
Silicone withstands mechanical stress and extreme temperatures, making its adhesive and sealant properties ideal for construction.
The sealant stays flexible rather than turning brittle because of its dense, low-oil composition and high elasticity.
Water Repellent
Silicone rubber has a silicon-oxygen base which is a thermally resistant waterproofing material.
The waterproof silicone rubber effectively waterproofs porous surfaces in buildings, such as stone and wood, and also in sports apparel.
Disadvantages Of Silicone
High Cost
Silicone is expensive because refining it requires high energy costs and costly raw materials like copper metal and hydrogen fluoride.
Sensitivity To Various Substances
Substances like sulfur-based clays can prevent silicone from curing, a problem known as cure inhibition. Uncured silicone remains sticky and difficult to work with.
High Viscosity
Thick silicone can be very difficult to pour and shape. Mixing in methylated spirits or white gas thins it out and makes it easier to use for mold making.
Frequently Asked Questions
What’s the difference between pourable silicone and silicone caulk from the hardware store?
Pourable silicone is a two-part liquid rubber designed to mix, pour into molds, and cure into a flexible shape that captures fine detail for casting work. Silicone caulk is a one-part sealant meant to stick into gaps and cracks without flowing, and it’s not suitable for mold making because it doesn’t pour or capture detail well.
How do I mix pourable silicone without creating air bubbles in the final mold?
Stir the two parts together slowly rather than whipping them, scraping the sides and bottom of the container to fully blend without folding in air. Pouring the mixed silicone in a thin stream from high above the mold lets bubbles stretch and pop on the way down, and a quick tap of the mold on your work surface pushes any remaining bubbles to the top.
How long does pourable silicone take to cure before I can demold it?
Most pourable silicones reach demold stage within four to 24 hours depending on the brand, thickness of the pour, and room temperature. Fast-set formulas like Mold Star 16 Fast can demold in as little as 30 minutes, while standard Mold Star 30 takes around six hours.
Can I reuse cured silicone from an old mold to make a new pourable batch?
No, once silicone has cured it cannot be melted down and reused as liquid pourable silicone because the cross-linking that turns liquid silicone into solid rubber is a permanent chemical change. Old molds can be cut up and used as filler inside new molds to reduce the amount of fresh silicone you need for a pour.
Is pourable silicone food safe for making chocolate and candy molds?
Only specifically labeled food-grade pourable silicones like Smooth-On Sorta-Clear 37 or Mold Star 15 Slow are safe for food contact. Most standard mold-making silicones are not rated for food use even if they look and feel identical, so always check the product data sheet for an explicit FDA food-safe designation before pouring anything edible.
Final Thoughts
For first-time mold makers, the easiest pourable silicones to start with are Smooth-On Mold Star 16 Fast or OOMOO 30 because the mix ratios are simple and cure times are short. Mold Star is softer and better for organic shapes with undercuts, while OOMOO is stiffer and more forgiving on measurement accuracy.
Serious prop builders and jewelry designers should upgrade to Dragon Skin or EcoFlex from the same brand. Dragon Skin holds sharper details under repeated casting, and EcoFlex is soft enough to replicate skin and flesh for FX work.
Home crafters and one-off project folks can often get away with cheaper generic kits from Amazon, but expect shorter shelf life and more air bubbles without a degas step. For food molds specifically, always buy a kit labeled FDA food-safe like Sorta-Clear 37.
The biggest difference between a frustrating first pour and a successful one is reading the datasheet carefully before you start, measuring by weight rather than volume, and giving the mixture a full cure at the right temperature. Respect the process and you will turn out molds that last hundreds of casts.