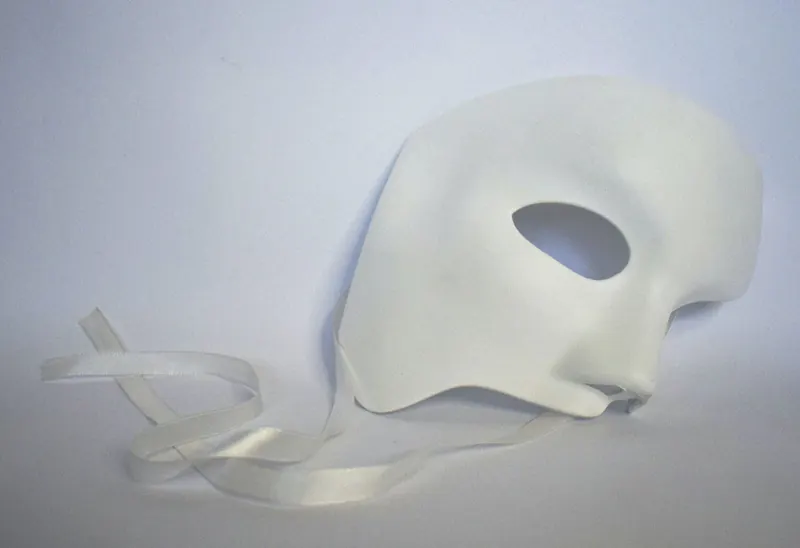
Store-bought Halloween masks look cheap and sit wrong on your face. A homemade silicone mask flexes with your expressions and picks up the kind of fine detail that makes film prosthetics convincing.
The standard kit is Platsil Gel-00 parts A and B mixed with skin-tone pigments, brushed into a plaster mold in thin layers. Platinum-cure silicone outperforms rubber for this job because it captures finer detail and stays flexible longer.
Plan on one weekend for the sculpt and pours, then a second weekend for painting and finishing.
Each silicone layer has to cure fully before the next one goes on. Rushing that step is the fastest way to ruin days of sculpting work.
This tutorial covers two methods: building from a clay sculpt on a lifecast, or pulling a mold directly from the wearer’s face with alginate and plaster bandage. The steps below start with picking a character design that forgives first-attempt mistakes.
How To Make A Silicone Mask Tutorial
- Deciding the character
- Making a humanoid
- Making silicone mixture
- Apply silicone mixture part 1
- Apply silicone mixture part 2
- Detailing the mask
- Demolding the mask
- Fitting the mask
Deciding the character
Before you buy a single pound of silicone, know exactly what you’re making. A clean, simple design with bold features will look dramatically better on your first attempt than a detailed fantasy creature with fine scales and textures.
Pick something that forgives sculpting mistakes, a zombie, a clown, a masked slasher villain. Save the detailed elf ears and lizard scales for after you’ve made one or two successful masks and know how the material behaves.
Silicone mask-making classes are also available if you are professionally making masks.
Watch out for one thing: you must leave open paths for your eyes, nostrils, and mouth, and those placements need to be planned into the sculpt from the very beginning.
Adding a breathing hole to a finished silicone mask is much harder than designing it in from the start.
Measure the mask against your own face before you commit to a final size, especially the eye and mouth opening positions.
Another thing that you should consider is the size of the mask.
The size of the mask should fit your face perfectly, with holes for the eyes and nose.
Making The Base Sculpt
The base sculpt, the model of whatever face or creature you want the mask to copy, is the most time-consuming step, and the one that decides how realistic your finished mask looks. Pro mask artists use oil-based clay like Monster Clay or Chavant because it doesn’t dry out between sessions and holds fine detail without cracking.
Cheap student clay from a craft store can get you through a first attempt, but it fights you the whole way, especially on lips and eyelids.
For a wearable face-fit mask, start with a plaster bandage cast of your own face so the mask will actually match your head shape. Apply petroleum jelly to eyebrows and hairline before the cast, keep nostril holes clear with small straws, and have a helper do the work because it is nearly impossible to wrap plaster around your own head solo.
How to make a mold
Making the mold for a silicone mask takes real planning. Start by locking in the character and the size of the mold, because the whole mask structure is built on top of it.
A sketch of your face drawn to the mask’s intended size is a cheap way to confirm proportions before you commit any clay.
You’ll need pottery plaster and student clay. The plaster forms the rigid outer shell, while the clay lines the edges so the silicone mixture doesn’t leak out during the pour.
Mold-making is fiddly but totally doable if you work through the steps in order.
Making of silicone mixture
Plenty of brands sell silicone gel kits, so pick whichever fits your budget. For this tutorial we’re using Platsil Gel-00 parts A and B along with silicone-specific pigments for skin tones.
Silicone will not melt at room-temperature cure conditions, which is why it works so well for detailed face molds.
You’ll need a clean mixing bucket (or a large deli cup) to combine the gel, equal parts A and B. Once the base is mixed, add your pigments in small increments until you hit the tone you want.
Cheap pigments streak and fade, so go with a reputable brand, the finished mask only looks as good as the color does.
One more thing: keep a pot of petroleum jelly or a silicone-safe mold release nearby. Brushing some inside the mold before the pour makes demolding the finished mask much easier later on.
Apply silicone mixture part 1
The silicone application happens in two stages. For the first stage, mix your silicone with pigment and gently brush it into the mold.
Keep the area around the eyes and nose clear, you need those openings so the finished mask is actually wearable.
Before you start brushing, coat the inside of the mold with release agent so the cured mask pops out cleanly later. A thick, even first layer is what gives the mask its final shape, so don’t skimp here.
If drips form along the edges of the mold, trim them off with a craft knife before they cure. Drip marks ruin the look of the finished piece.
Apply silicone mixture part 2
After applying the first batch of this silicone mixture, you need to give some time for this mixture to dry into the mold.
After the first batch of the mixture is dry, you need to prepare the mixture again.
After preparing, you can now apply the mixture inside the mold.
In this part, apply a good amount of mixture in the mold so that the mask is good-looking.
If you are making this silicone mask for Halloween, you can add different colors to the mixture so that the final product looks scary.
You can also use simple skin colors so they make looks real.
Detailing the mask
If you are making masks for Halloween you can make this mask look scary by adding details.
You can use different elements to make this mask look great or even add make-up to give a nice final touch.
You can use details like skin lines, eye hair, and hair to look good.
For example, you can use colors and some other things to make this mask look different.
Making details is creative work so you can hire someone to help make this mask look great.
The step below is for those who are creative.
Those who can use their creativity to make the mask look stunning.
In movies, this type of work can be used with VFX technology, and making use of it gives a stunning look to the character.
Demolding the mask
After some time when the mixture is dry, you can unmold the mask.
You can use a knife to unmold.
Demolding the mask carefully, you can use help from another person so that the mask removes out easily.
If you have applied a good moisturizer in the beginning, it will be easy to remove the mask from the mold.
Gently remove the mask from the mold and add some baby powder when you wear the mask.
Fitting the mask
The mask is removed from the mold and dried.
You can use these masks for various purposes like Halloween purposes and any other event like for some videos, VFX work, etc.
In some movies, they also use these types of masks and make VFX so that they look very good.
You can gently put your make-up on your face, and gently press all the areas so the mask is in a good position and good looking.
After wearing the mask, you can also apply makeup so it looks more unique and different.
The Things You’ll Need To Make A Silicone Mask
Some basic things that you will need to make a silicone mask.
All these things are easily available in the online store.
If you can’t make the mold yourself you can buy the mask mold so that it saves your time.
There are latex masks that you can also choose for Halloween.
- Silicone A and B
- Silicone thickener
- Silicone colors
- Mixing buckets
- Measuring cup
- Paintbrushes
These are all normal things you need to make a silicone mask.
Silicone A and B
These are thick gels that are used for making a silicone mask.
This is silicone-based so there are a lot of brands, you can choose one of them for making a silicone mask.
For this, you can use Platsil gel-00 A and B and you can easily get them online.
Silicone thickener
This substance is used after applying silicone mixture A and B.
This is also what you can buy online easily.
Silicone colors
Silicone colors are used for making the mask look great. You can use different colors for making the mask-like skin color or other colors etc.
You can buy these colors online easily.
Mixing buckets
Mixing buckets are used to mix these silicon gels.
You can carefully put both of the mixtures in the bucket and gently mix them.
Measuring cups
Measuring cups are used for measuring the amount of silicone gels and silicone paint that you are using.
Things To Consider While Preparing Silicone Mask
While preparing the silicone mask there are certain things you can consider.
You can easily make a silicone mask right at home but there are some materials you should check out while setting up to make a mask.
Using good quality material
To make a silicone mask, you can choose from good quality material like silicone A and B, silicon 10, and silicone of other thickness.
All the materials are available online and you can check them out.
Good quality material is also needed for a good quality mask as it doesn’t harm your skin and has a longer life.
Preparation of mask
There are a few things to consider while making the silicone mask.
Take different buckets for different mixtures like silicone mixture.
You can also help another person to prepare the mask.
Using good colors is one thing you should take note of.
Color choosing also depends on your requirements.
For example, if you are looking for Halloween, you can use colors like blue, dark brown, etc, and a combination of other colors so that this looks good and scary.
If you don’t want to add these bright colors, you can add some way darker colors also.
While preparing silicone masks, ensure you check out the holes for the eyes and nose as these are important because you can’t wear a mask without these.
While applying silicone mixture in the mold you can leave some holes for the nose, and ears and also for when you prepare the full head mask.
Wearing the mask
When your mask is prepared and fully cured you can use this mask, while wearing the mask, you can add some baby powder or moisturizer.
After applying baby powder to the inner section of the mask, you can then wear it, this is helpful for comfortable wearing and to pull out the mask.
Uses Of The Silicone Mask
The silicone mask is used in different ways. You can use this on Halloween or in movies.
There are some online pranks where you can use these masks.
Some scary movies used these types of masks.
In movies, the character also uses these types of masks because compared to the face make-up this mask fits well and is easy to do without worrying.
This mask is used for VFX also.
VFX technology is more advanced now so these masks are very helpful for use in movies.
Silicone Art
In today’s time, there are a lot of movies using these types of silicon masks in their movies.
This opens up new opportunities for employment as there are a lot of artists who work on this art.
Some people create extraordinary silicon masks based on their creativity.
In VFX, the mask needs more detailing for a specific character and make-up to help create a better-looking character for movies.
Nowadays 3d printing also uses making and selecting the character of these silicone masks.
In 3d printing, programs suggest the best character according to need and they make better silicone masks.
How To Make A Silicone Mask Tutorial 2
In the previous tutorial, we discussed basic silicone mask making, however, for that method, you need a humanoid.
Without a humanoid, mask making is not possible, and making a humanoid is a difficult process.
So in this tutorial, we are discussing steps on how to make a simple silicone mask without a humanoid.
In this process of making a silicone mask. You need plaster for making the structure hard, clay for setting up the mold, silicone mixture for the base of this mask, and lastly, alginate.
- Project overview
- Deciding your character
- Create a character mold
- Sculpting
- Pour silicone mixture
- Extract your mask
Project overview
The process of silicone mask making is multi-step oriented, similar to making silicone candle molds in its reliance on careful layering and cure timing.
There are a lot of things you need: bandages, clay, silicone mixture, etc.
First thing is to take all the necessary materials and create the mold of the character.
In this mold there are two sides: the first side is your character and the second side is your mask layout.
This is a multi process oriented project so it needs patience.
Moreso, it takes 2-3 days to construct this silicone mask.
Deciding your character
Deciding the character is the first step of creating the silicone mask.
Carefully decide the character because this character is the final layout of your mask so carefully and patiently sit on a chair and decide for whom you are making this silicon mask.
In this step, you need to make a mold.
For creating mold you need to alginate and mix up as per the instructions given in the box.
Quickly apply this on the face of the character and keep eyes and nose holes clear.
Clearing all the holes is important because without that you cannot wear your mask.
Make your face quickly. You can also make use of cream of wheat.
After some time when mold is dry, you can use plaster bandages to make this hard.
Again keep all the holes clear.
Use these plaster bandages in a criss-cross pattern.
After some time these bandages get hard, after that you can unmold your character.
Step 2
After creating the first character you need to create the final part of the mold.
Fill any air holes in the mold.
You need to keep the surface flat.
You can definitely use woodblock and clay to set this with the character.
Use plaster to make this hard and retain this structure overnight and unmold this the next morning.
Sculpting
This is the fun part. In this step, you can use clay to give this mask a better look.
It takes time, uses your imagination, and creates this mask for whatever purpose you are creating.
After sculpting your character, build a framework that is larger than what you have built.
After that use plaster and clay to face up on the board.
Fill all holes with clay and let it stay overnight until it becomes hard.
Pour the silicone
In this step, you need to make a silicone mixture.
Use some mixing buckets for mixing silicone mixture.
You can also use colors for making these masks look real, you can also add skin color so that this mask looks more real.
Use silicon A and B other gels and pour all the silicone mixture into the mold.
Relax this mixture for some time and wait to set this up.
Extract your mask
After some hours of rest, it is time to uncast your character.
You can use a knife to remove this silicone mask.
You can also remove unnecessary silicon parts to make this look good.
After carefully extracting the mask from the mold, the mask is now ready for use.
See that all holes are proper.
You can use these masks for any purpose you want.
After extracting the mask you can use make-up also to enhance your look.
Aside from these two methods, there are other methods for making silicone masks.
All depending upon material availability and your skills, you can make silicone masks from the comfort of your home.
Frequently Asked Questions
What kind of silicone should I use to make a wearable mask?
Platinum-cure silicone in the Ecoflex 00-10 to 00-30 hardness range is the standard for wearable masks because it flexes with facial movement and feels soft against skin. Dragon Skin is another popular choice when you need higher tear strength for detailed features like ears, noses, or thin edges that take more abuse during wear.
How much silicone do I need to make a full-head Halloween mask?
A full over-the-head mask typically needs between two and four pounds of silicone depending on how thick you brush the layers and whether you add a gel-filled core. A simple face-only half mask can often be done with one pound or less.
Can I paint a silicone mask with regular acrylic paints?
Regular acrylics peel off silicone because nothing sticks to the low-surface-energy rubber without a bonding agent. You need silicone-specific paints like PsychoPaint from Smooth-On or acrylics mixed with a silicone adhesive medium so the pigment bonds permanently to the mask and won’t flake during wear.
How long does a DIY silicone mask take to fully cure before I can wear it?
Most platinum-cure silicones set to touch within four to six hours and reach full cure in about 24 hours at room temperature. If you are brushing on multiple layers, each one needs to cure before the next goes on, so a full-head mask usually takes two to three days of work.
Is it safe to wear a homemade silicone mask for long periods?
Yes, as long as you used skin-safe platinum-cure silicone and left breathing holes at the nostrils and mouth. The bigger issue is heat buildup, since silicone traps sweat and body heat and can get uncomfortable after 30 to 60 minutes, so plan on taking short breaks during extended wear at conventions or haunt events.
Final Thoughts
For first-time mask makers, Smooth-On Ecoflex 00-30 paired with a plaster bandage face cast or a purchased lifecast is the sweet spot. Ecoflex is forgiving on mix ratios, cures at room temperature without heat, and flexes enough to handle full facial expressions without tearing.
Halloween hobbyists should budget for at least one test pour on a throwaway sculpt before committing to the final mask, since pigment-to-silicone ratios are easier to learn on scrap. Buy PsychoPaint or a similar silicone-based paint system from the start because regular acrylics flake off cured rubber within a single wear.
Serious FX artists working on film or theater productions should look into Rubber Glass, Platsil Gel-10, or FuseFX for detail passes, since these hold up to repeated stage-light wear. Combining a silicone shell with a deadener-softened core mimics the soft give of real flesh, which turns a DIY project into something film-grade.
Whatever your reason for making one, the craft rewards slow deliberate work over speed. Block out a weekend, ventilate your workspace, wear gloves, and take photos at every step so you can learn from what worked and what didn’t.